Note: This post contains some affiliate links. These links allow us to receive a small commission on recommended products at no extra charge to you. This is not a sponsored post.
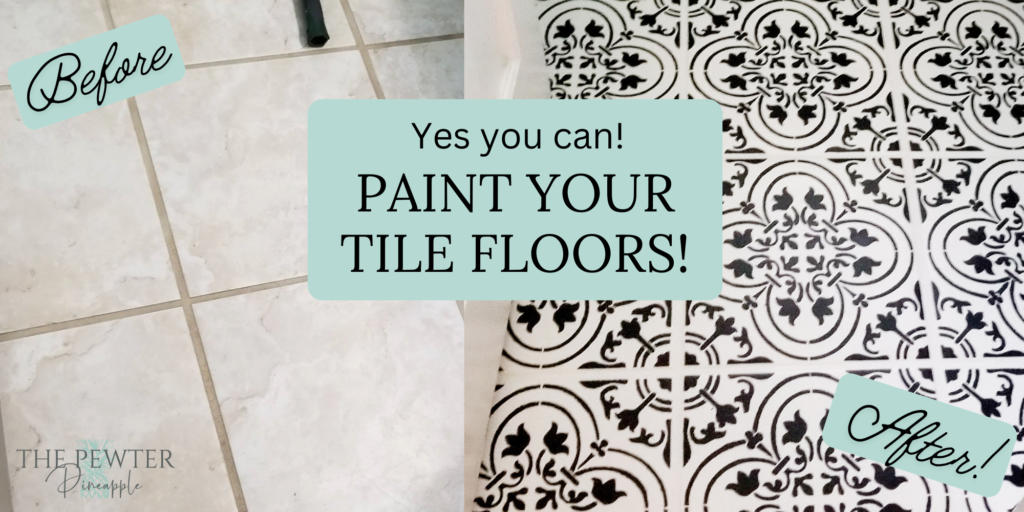
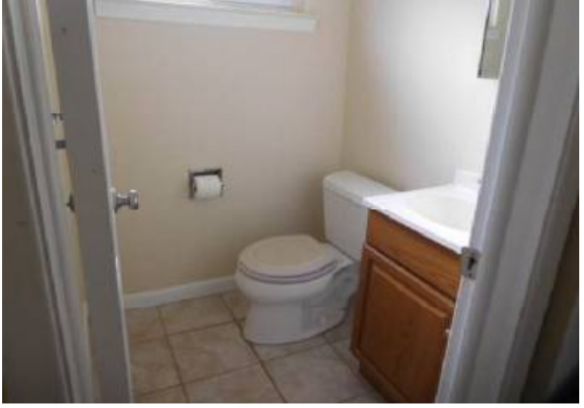
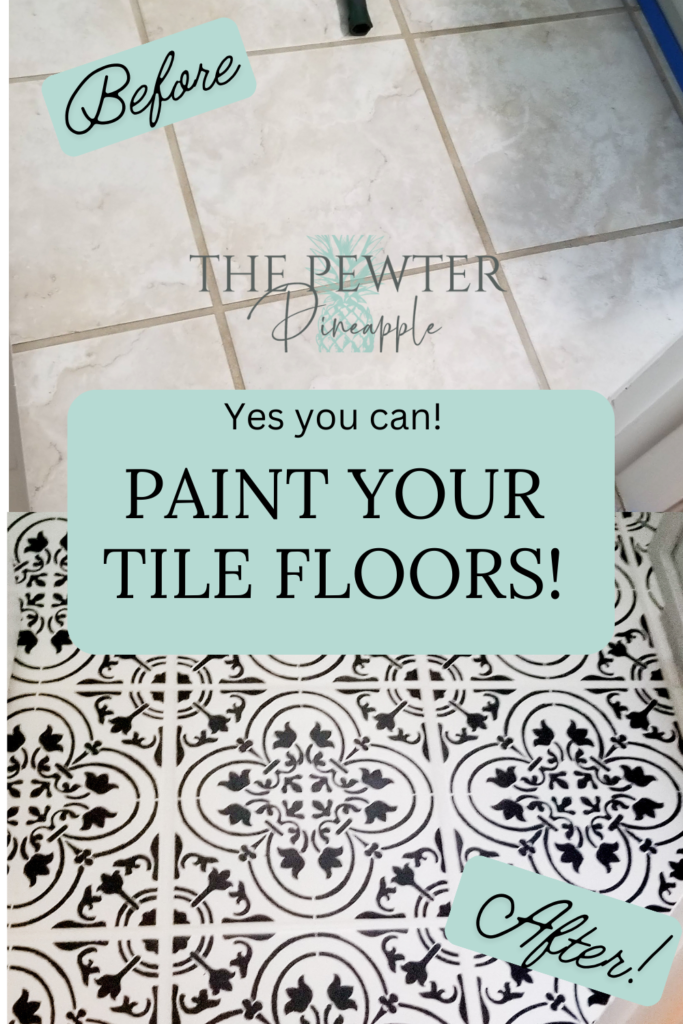
When we moved into our first house we were so excited, we had done it, home ownership adulting level unlocked! As with most peoples’ first home ours wasn’t exactly the Taj Mahal, but it was perfect for us. That being said there were quite a few projects that we had on our list of things to spruce it up. One that I am particularly proud of is having the gumption to hand paint the tile floor in our downstairs guest bathroom!
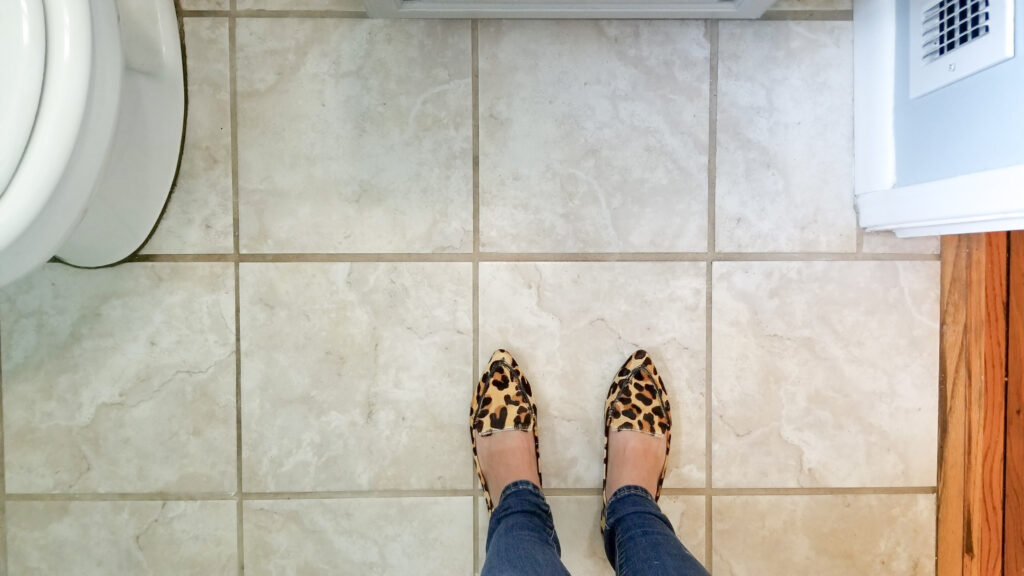
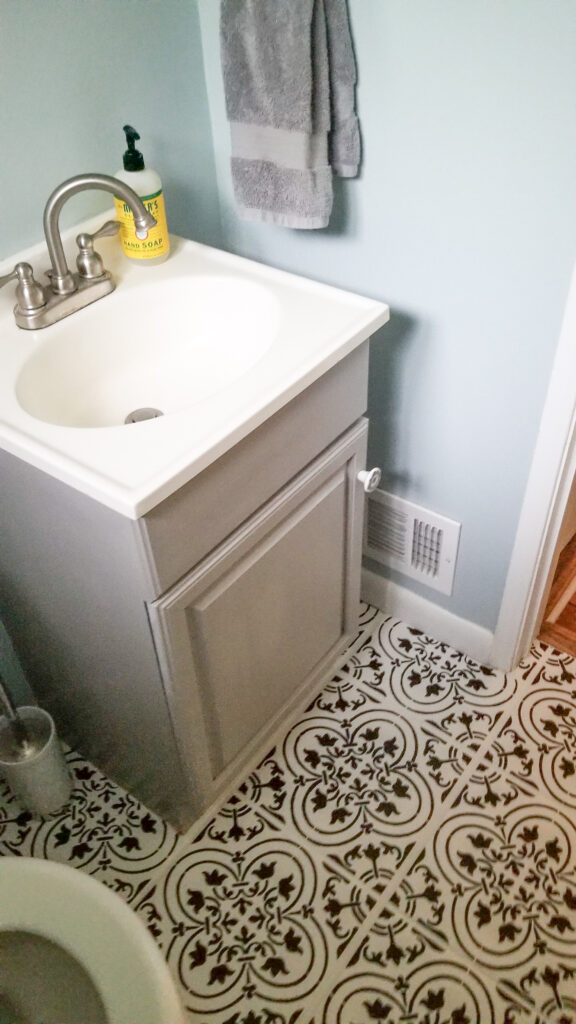
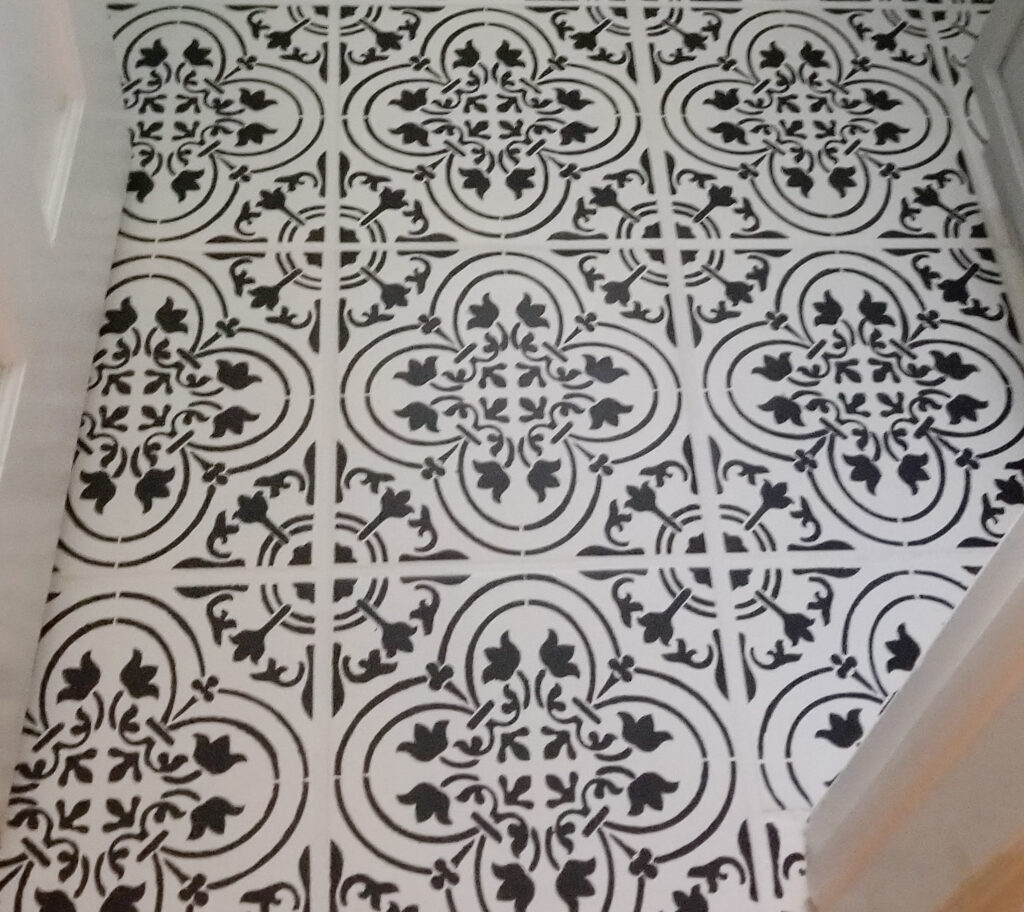
The original tile was fine I guess, sort of a neutral, but it was also getting old and it was not very inspiring. The thing was, I had fallen in love with these black and white tiles I was seeing on Pinterest. You know the French cafe, Moroccan inspired ceramic tiles like these from Wayfair. BUT there was ABSOLUTELY NO WAY I was going to actually RE-TILE my own bathroom, I’m brave when it comes to projects, but not THAT brave (yet?).
Then I discovered that you can actually PAINT YOUR TILE! As I was looking around the internet for other ideas I came access some bloggers who had tried stenciling their tile floors. Surely this was a Pinterest fail waiting to happen right? After some more reading it turns out the idea has legs!
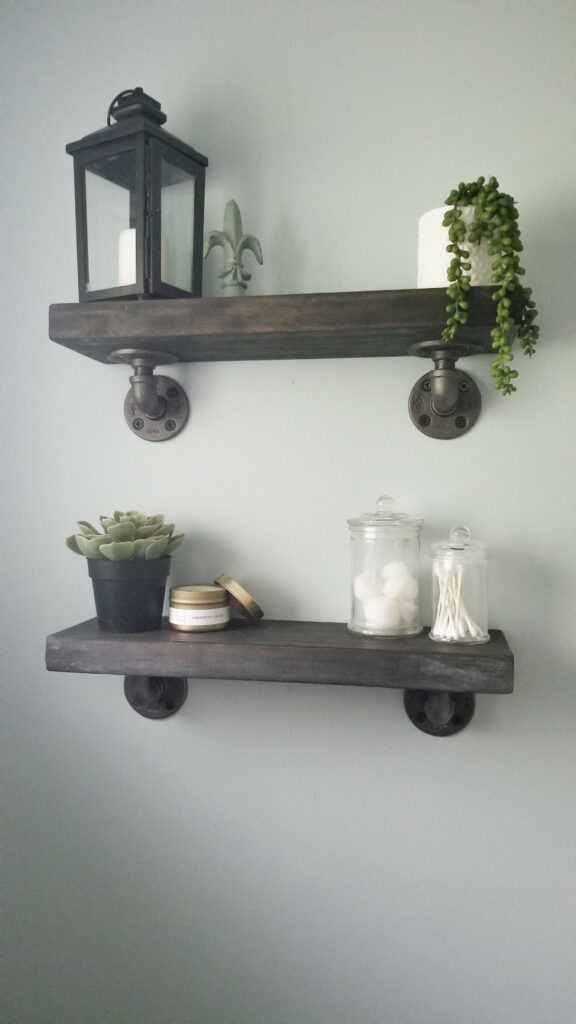
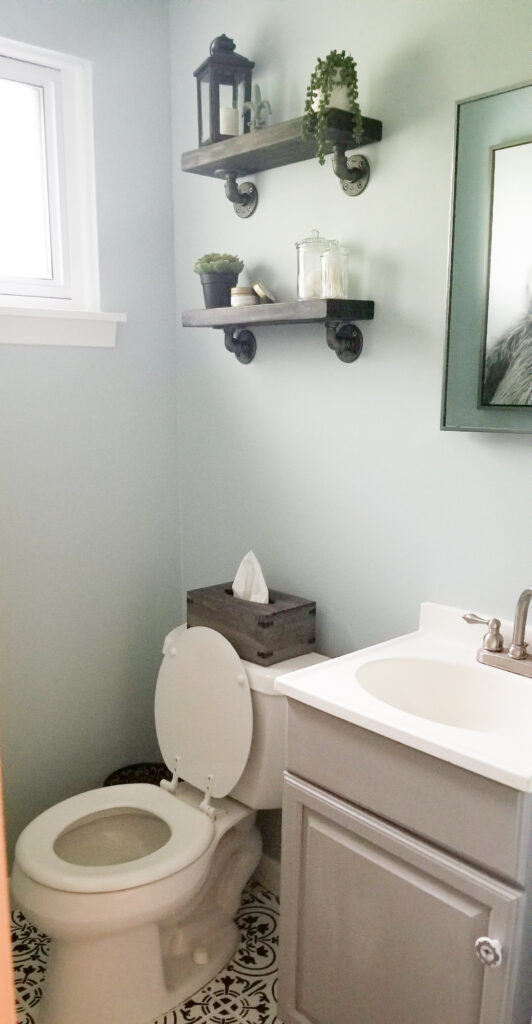
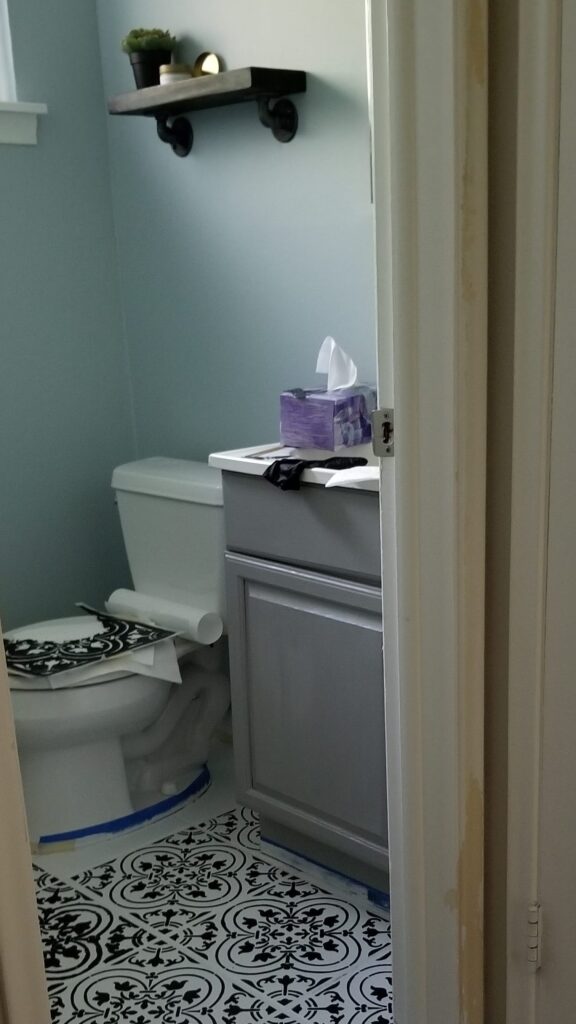
I had already started working on the bathroom facelift including a new light, fresh coat of paint on the walls, new shelves, and chalk painting the vanity myself, so at this point I was pretty invested in finishing the project.
The only problem was that every blog I had read used a different set of products and a slightly different method. Some sanded the tiles first, others used a special primer paint before the background color, and nobody was using the same type of top coat. This is where I tend to get a little stuck in my projects usually, analysis paralysis you know. And this is when I came across the Rust-Oleum System, It was easy, straight forward, and did NOT require sanding, you could paint right over the grout, and it came with a recommended top coat. It made it sound easy which was just the boost of confidence I needed!
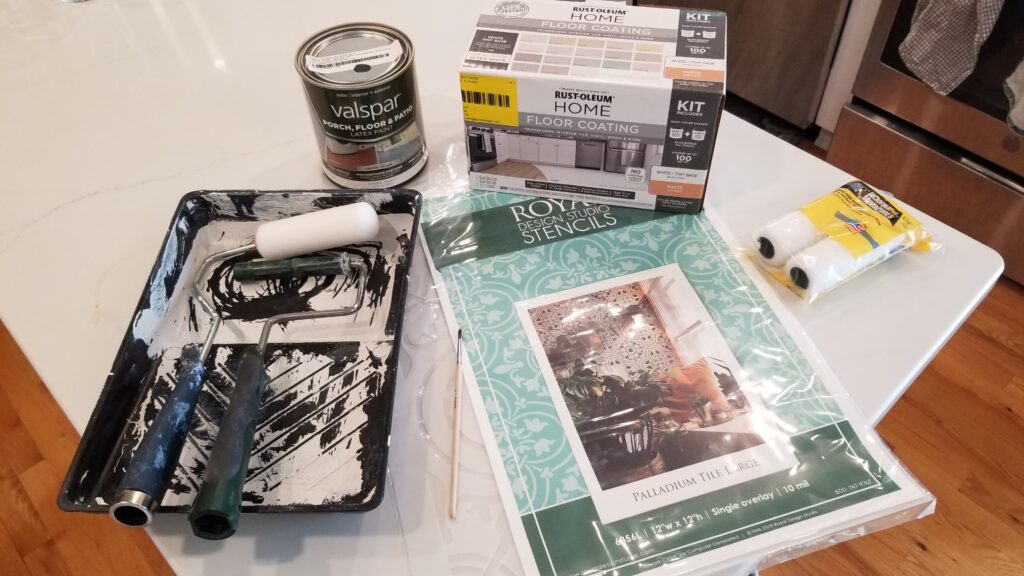
I bought the Rust-oleum home floor coating kit in matte white for the background. For the black design I went with The Valspar Porch and Floor Latex paint in satin. Now why, you may ask, did I not use the same product for the black pattern, especially when i had been so paralyzed by all the options? Well it’s silly really, at the time the black was completely sold out everywhere, and I just really wanted to get this project done, So I went to Lowes and asked what they had available and this was what they recommended.
The black paint is now back in stock, and it probably will work just as well as the Valspar that I used, but I do have to say the Valspar did a great job too, and was easy to work with. It was a little thicker than the white rust-oleum paint which was good for the stenciling work.
I bought the stencils from Royal Design studio stencils. They have so many gorgeous patterns that even though I had been looking at this exact pattern for months, I almost went in at least two other directions. But ultimately I decided to go with my gut and stick to the one that had inspired me and I am so happy that I did.
All told the process took about a 5 days and except for a little touch up work where I had used too much paint for rolling on my first stencil, it all went very smoothly.
So would I recommend doing this in your home? ABSOLUTELY! It was a pretty easy and low cost project, that required very few actual supplies, the biggest thing you need is patience to let the tiles dry in between coats. That being said I do have a few tips for the process to help insure you don’t make the same mistakes I did.
Keep reading for a more in depth “how to” with a supply list, and extra tips!
List of Supplies with (affiliate) Links
- Palladium Tile Stencil (12×12) from Royal Design Studio stencils
- Rust-oleum Floor paint kit
- Valspar Floor and Porch Paint – sold at Lowes
- Foam Rollers
- Trays
- Small touch up Brushes – I’ve always got a few sets like this laying around for projects, usually i grab them from the dollar tree, but if they are out, this set is bigger and will give you options 🙂
Time line – Give yourself 5 days realistically to get this done. Especially with the stenciling it’s best to really let it dry in between tiles, and the final top coats need more time to dry and Cure before you can walk on them.
Tips
- Wear white socks: No matter how clean you think your feet are (and your socks for that matter), don’t risk it, until its sealed, wear white socks! Your bare feet will leave smudges and the little stuff sticks and can imbed dirt right into the base paint. After my first stencil i noticed some smudges on the white tile that i ended up painting over. From then on I Kept a little pile of clean white socks handy, and also used a clean lint free white towel to kneel on while i was doing the stencils.
- Buy 2 or 3 stencils: This has several benefits, 1 you can paint more than one tile at once which makes things go faster, and two while you will use the square one for most of the large tiles, at some point you will need to start cutting up the stencil to accommodate the tiles around the toilet and any other oddly shaped pieces that they used to finish the floor. having multiple stencils will help make this wacky jigsaw puzzle so much easier!
- Practice your stenciling technique ahead: I had basically no stenciling experience before this (unless you count elementary school art projects) and I wish that I had practiced just once on a piece of cardboard to get the technique right. On my first tile I WAY over applied the paint and it was a much heavier design than the rest. I ended up going back and touching over the edges of this one by hand with white paint to make it match.
- Let it fully dry: as you get towards the end of the stenciling and there are no longer any blank tiles to kneel on, be sure you are allowing enough time for the stencil pattern to dry before sitting on or standing on it.
- Do 2 or 3 coats of top coat: The Top coat is what seals the paint and makes it durable for walking on. I did one more than the instructions said to do and I was extremely happy with how it held up. By the time we moved out 2 years later, the floor had no scratches and was still cleaning up like new!
How to Paint Your Tile
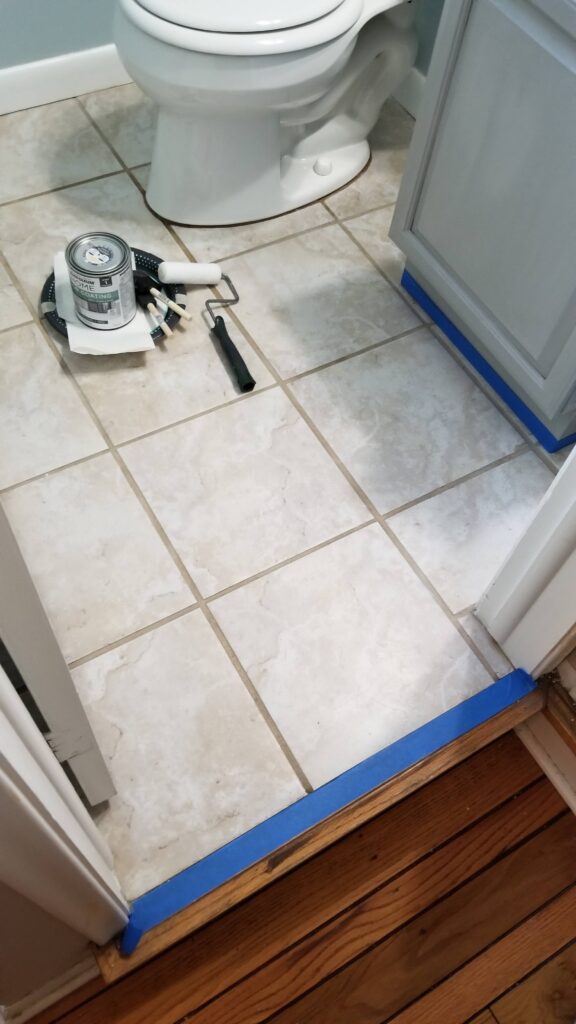
Step 1: Start by cleaning your floor and grout really well! Use your usual home cleaning products first, make sure all the dirt and dust is gone, and then use the cleaning product that comes with the kit. Also Tape off any vents to the room so dust isn’t blown in.
Step 2: Tape off the baseboards and toilet with painters tape and prep your staging area with your paint.
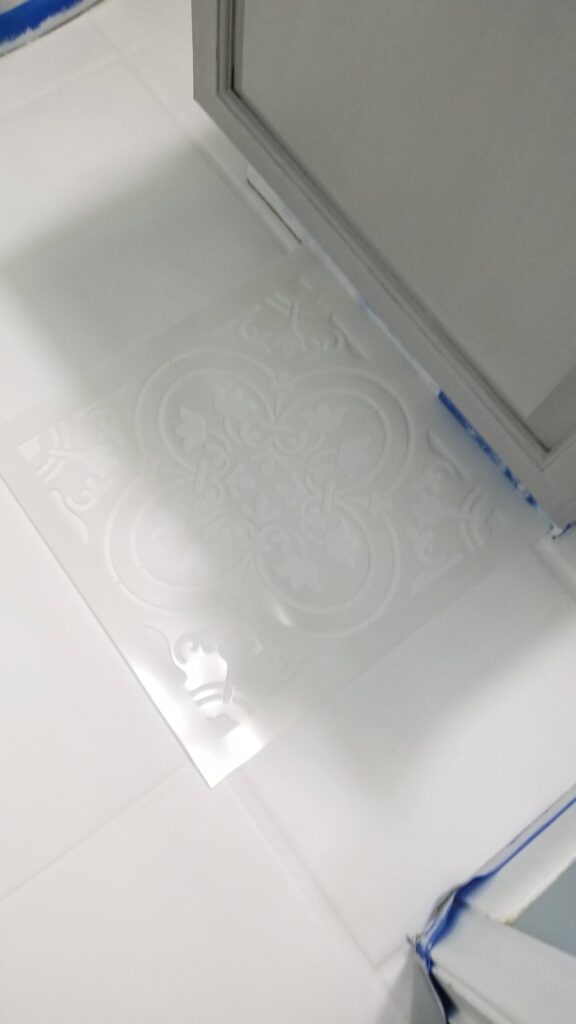
Step 3: Roll on your base coat (the white) with a foam roller. You can roll this right over the grout too! This may take 2-3 coats depending on your underlying color, use your best judgement, and follow the drying instructions on the paint can (always allow extra time for drying in humid environments!)
Step 4: Place your stencils on your tiles and use painters tape to secure the stencil to the tile. If you are doing multiple stencils at a time it’s best to do diagonal tiles so you don’t have to deal with weird taping situations. Make sure you don’t have too much paint on your roller! You can always go over it again, but if you have too much paint it will bleed under your stencil!! If you don’t feel comfortable using the roller, you can also use a sponge. Yet another good reason to practice your technique ahead so you can see which you feel more comfortable with.
Step 5: Once you have completed all of the full size tiles you can begin to cut the stencil down to accommodate the edge tiles under the sink, around the edges and around the toilet. This takes some “figuring” out. I went in and identified the next largest tiles and worked my way down to the smallest from there. I’m really glad I had 2 stencils because there were a couple of shapes that I just would never be able to cut out of the same piece.
Step 6: Touch ups, this is your last chance to “fix” any of the boo boos that may have occurred during your painting. I used a couple of small paint brushes and went over the edges where I wanted a clearer line, or where a little extra blob of paint had gotten away from me. Luckily this didn’t take too long, but it could be a huge pain in the bum if you weren’t as careful in the painting process, did I mention its good to practice your stenciling technique before you start ;P ?
Step 7: Finally Apply the top coat liberally but also being carefully not to create bubbles, Follow instructions on the package for drying times and be sure to apply multiple coats for the best durability. Note that drying times may differ depending on the climate you live in. I would also recommend allowing the floor to cure for a little longer than is recommended on the package before walking on it.
Step 8: Cool now how do i clean this thing? We used vinegar and water on it as well as Swiffer wet mops. I also ran my Dyson vacuum over it from time to time. It looked like new every time and it was none the worse for wear!
Et Voila! A stunning fancy tile floor that you painted yourself. I have gotten so many compliments on this floor over the years, and it’s always so fun to tell people I painted it myself! So YES you totally can paint your tile, and yes it does hold up, at least as far as I know. I painted the floor in 2020 and we sold our house in 2023, but at the time of the sale even the realtor thought that these were actual tiles!
This is professional quality. Both the personalized instruction and the photography.
Have you two considered making this a U Tube video? This script is perfect— just needs your personalities. I love the writing style.
It would Val make it all the more inviting. You would be better than Chip and Joanna.
Wow! This looks amazing! I love all the tips and detailed instructions. Thank you!! Just amazing!!
Good post! We will be linking to this particularly great post on our site. Keep up the great writing
Looking forward to your next post. Keep up the good work!